Phase 0: The Starting Point of this Kitchen Remodel
Before we got started, this kitchen was ready for a major upgrade, and the homeowner wanted one. The doors were an older more traditional style, the countertop was Formica, and this kitchen deserved a refreshed look. We removed the existing cabinets to make way for a completely new layout and custom-built solution. This phase is where we evaluate the space, plan the design with the homeowner, and get everything ready for a full transformation.
Phase 1: After Cabinet Removal or Working With A Clean Slate
Once the old cabinets were out, the space was opened up and ready for something completely new. This is one of the most important steps in the process because it allows us to prep the area and ensure everything is ready for a smooth installation.
Starting from a clean slate gives us the flexibility to build a kitchen that’s not only beautiful but also highly functional and tailored to the homeowner’s needs.
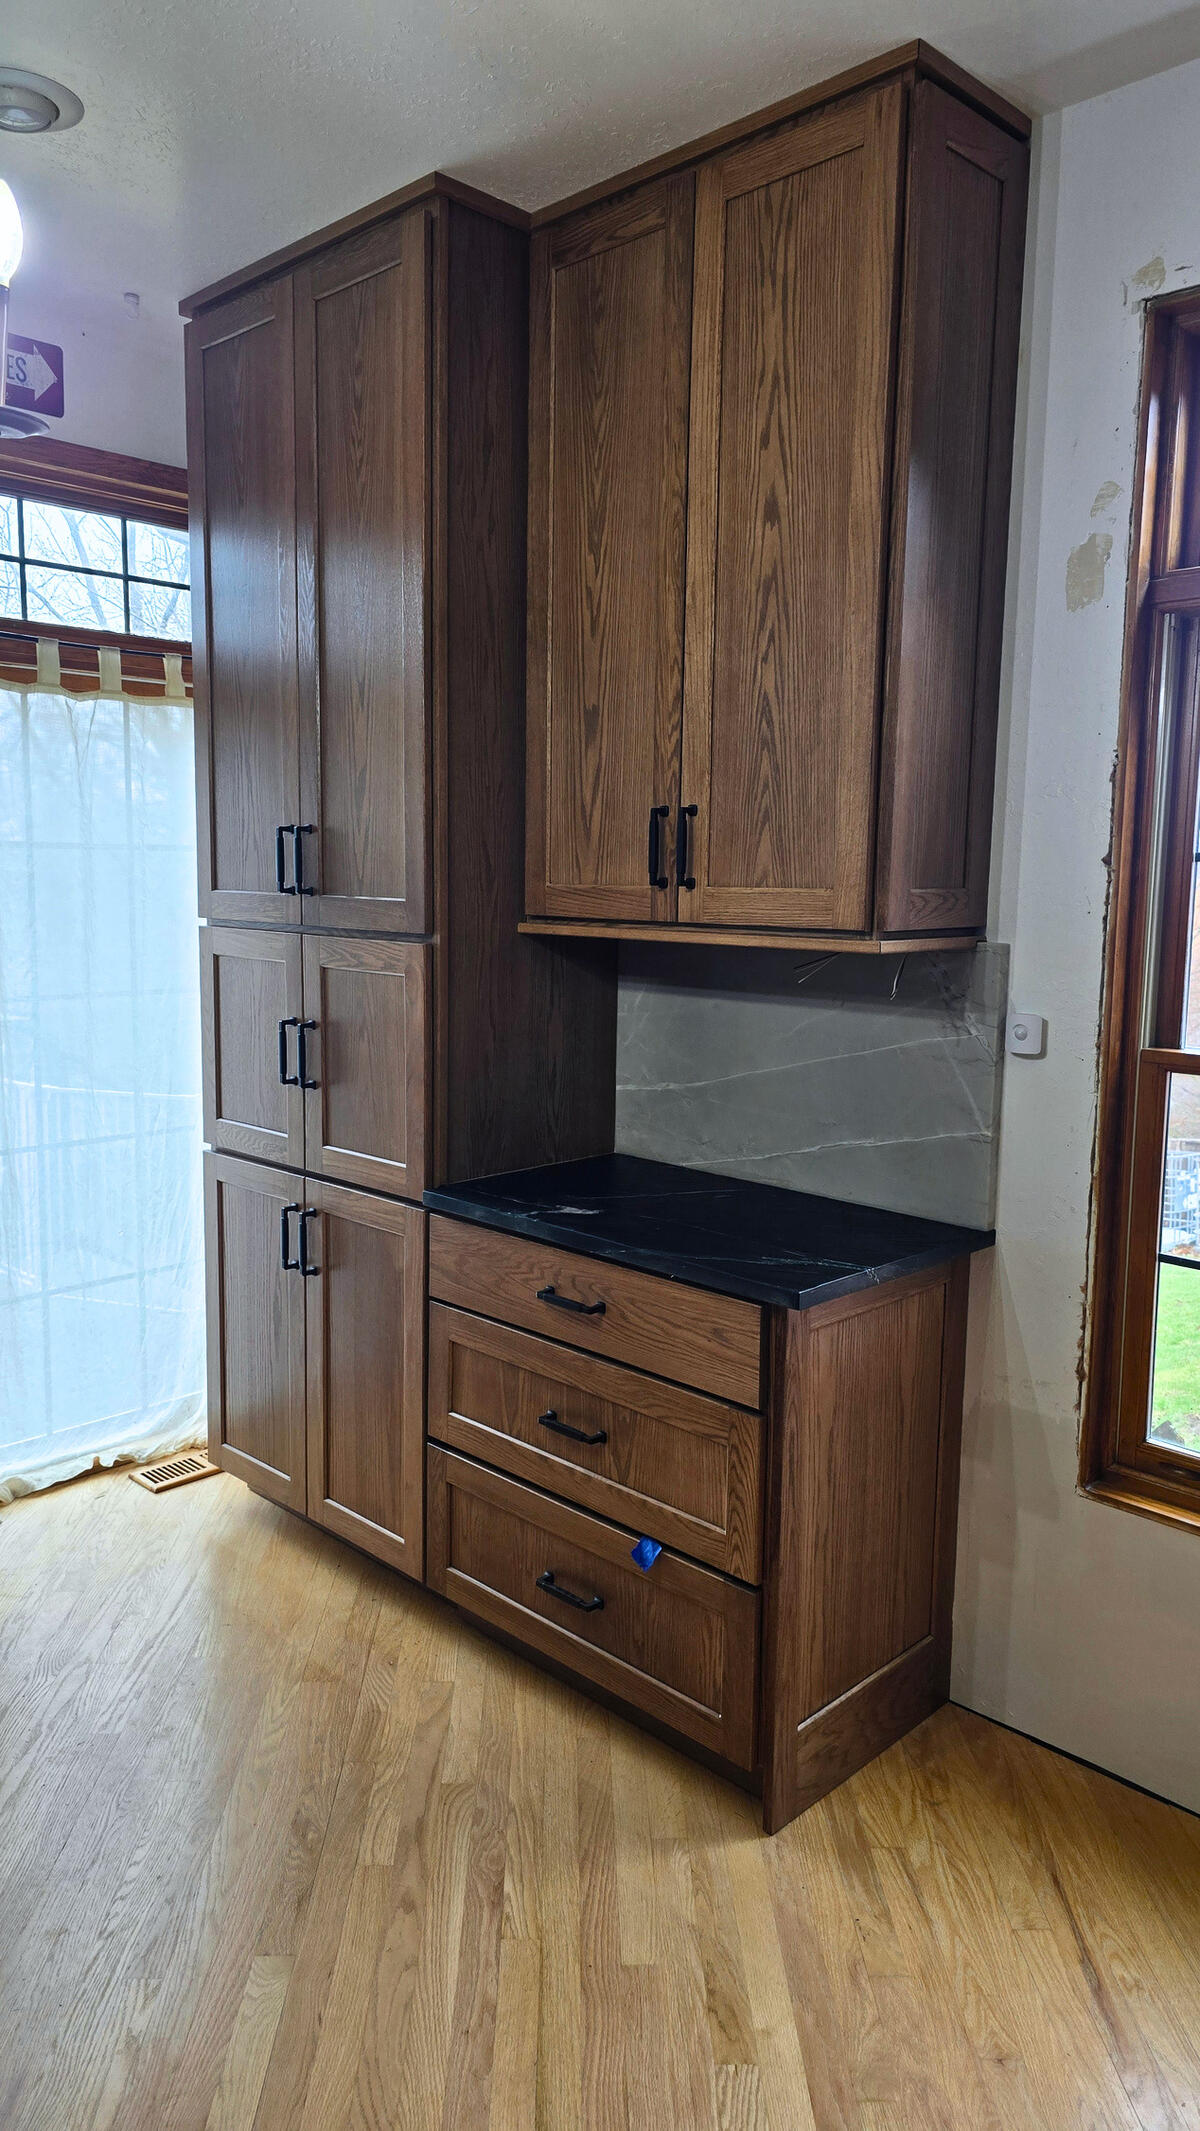
Phase 2: Cabinet Installation: Custom Craftsmanship Comes to Life
This is where the kitchen remodel transformation really starts to take shape.
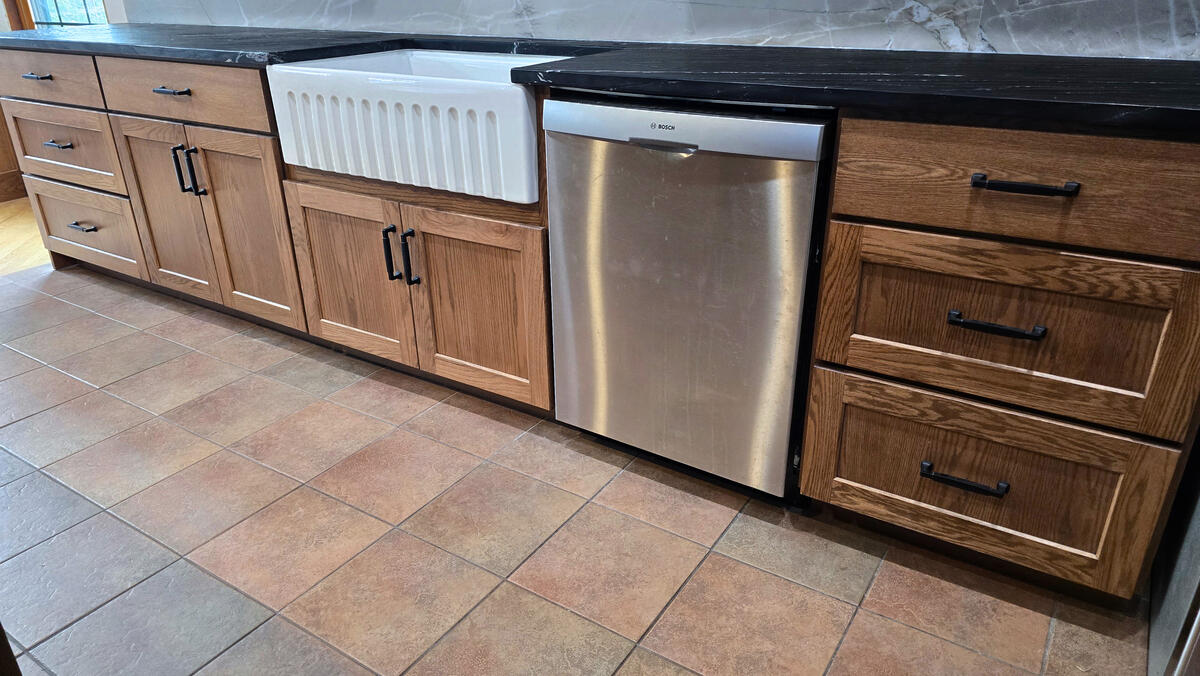
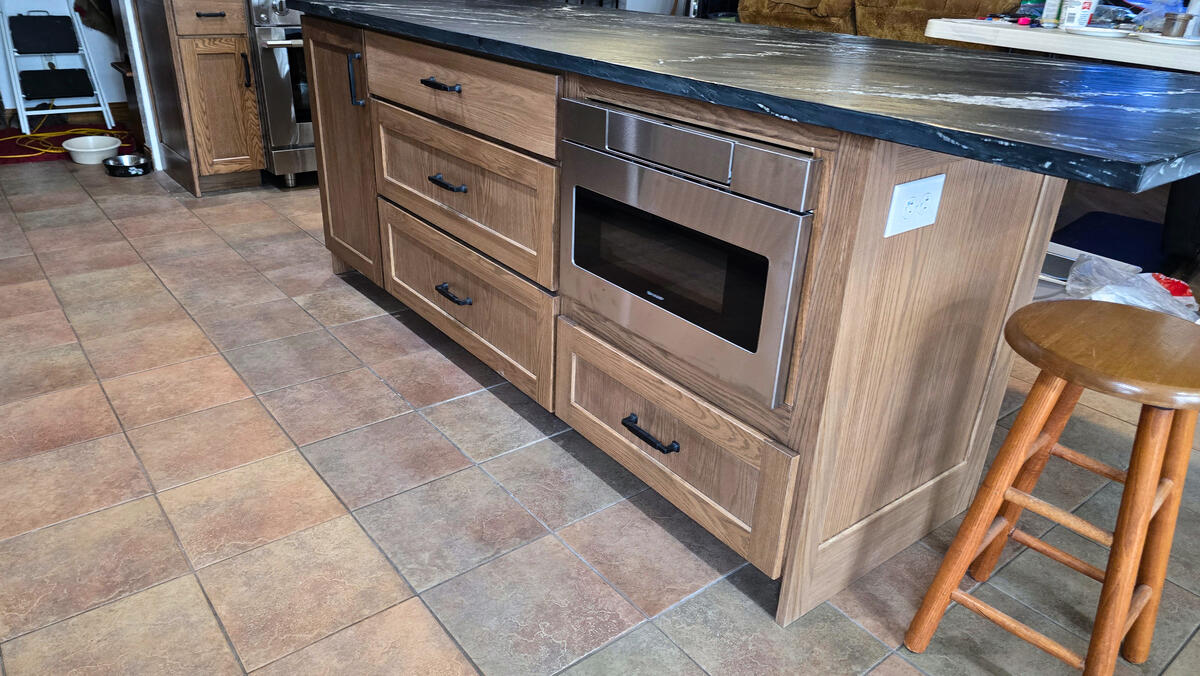
All of the cabinets in this kitchen were custom built by our sister company at Cabinet RX using red oak and finished with a rich walnut stain that adds some old world warmth and character to the more modern cabinets. The design features a mix of Shaker 45 doors and drawer fronts, along with some slab-style drawer fronts to give it a more modern, high-end feel.
We also added custom Shaker 45 side panels throughout, creating a seamless, built-in look.
Beyond the appearance, this kitchen is packed with functional upgrades:
- Full-extension, dovetailed maple drawers with a clear coat finish
- Soft-close doors and drawers throughout
- A custom sink base designed for a farmhouse sink
- Glass cabinet doors for added style and display space
- A built-in microwave cabinet in the island
We also incorporated some unique storage solutions, like toe-kick drawers that make use of space that’s usually wasted, along with a pull-out storage box for added convenience.
One of the standout features is the appliance lift shelf, which allows the homeowner to easily store and access a small appliance (like a Kitchen Aid Mixer) for easy use. Tucking it away again, after use, is as easy as pulling the bar to unlock it and letting it down. The hardware does the hard work of supporting the appliance for an soft-close finish.
Check out the video below for a tour of this phase.
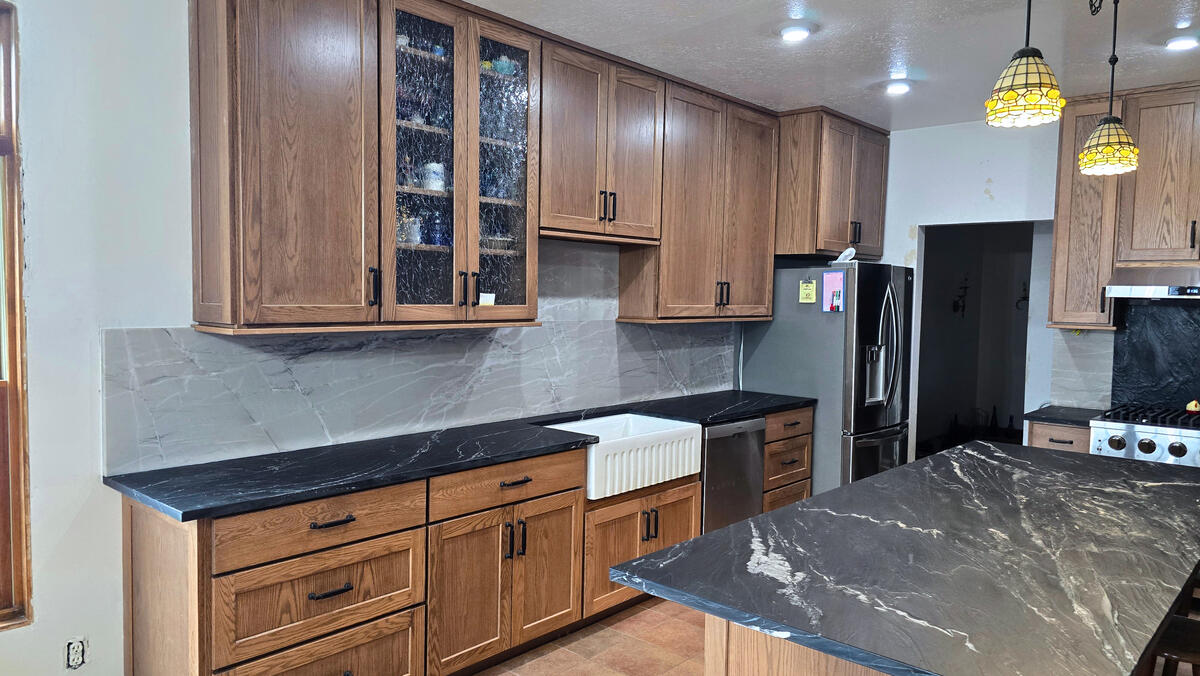
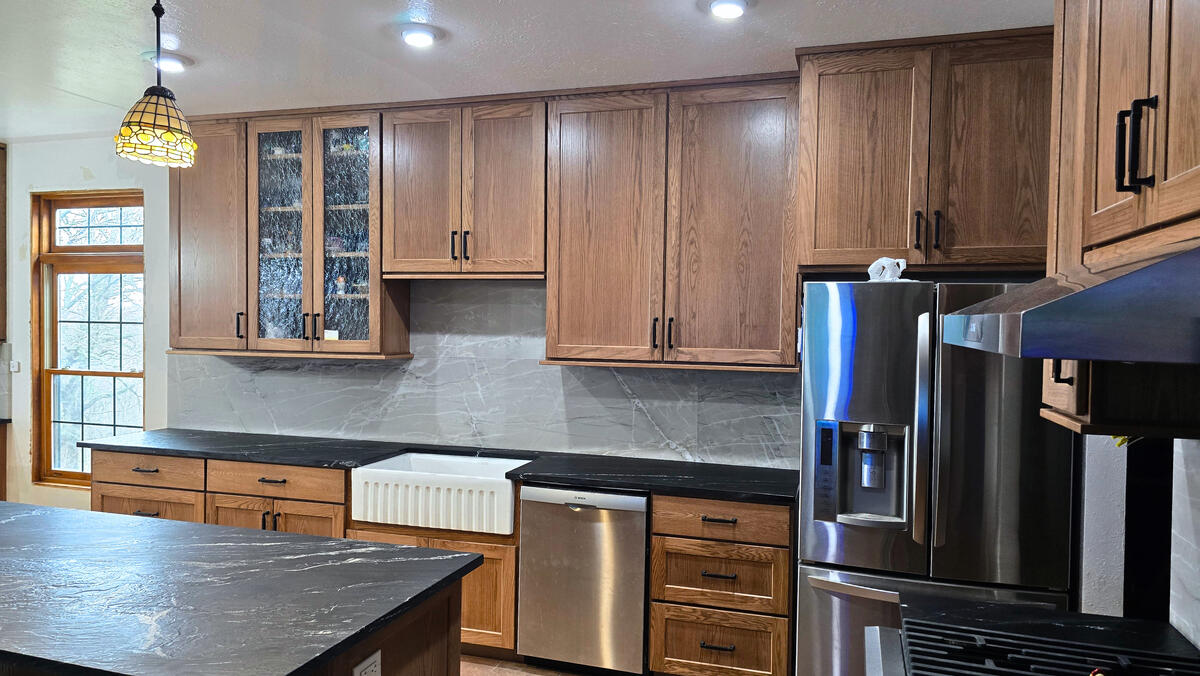
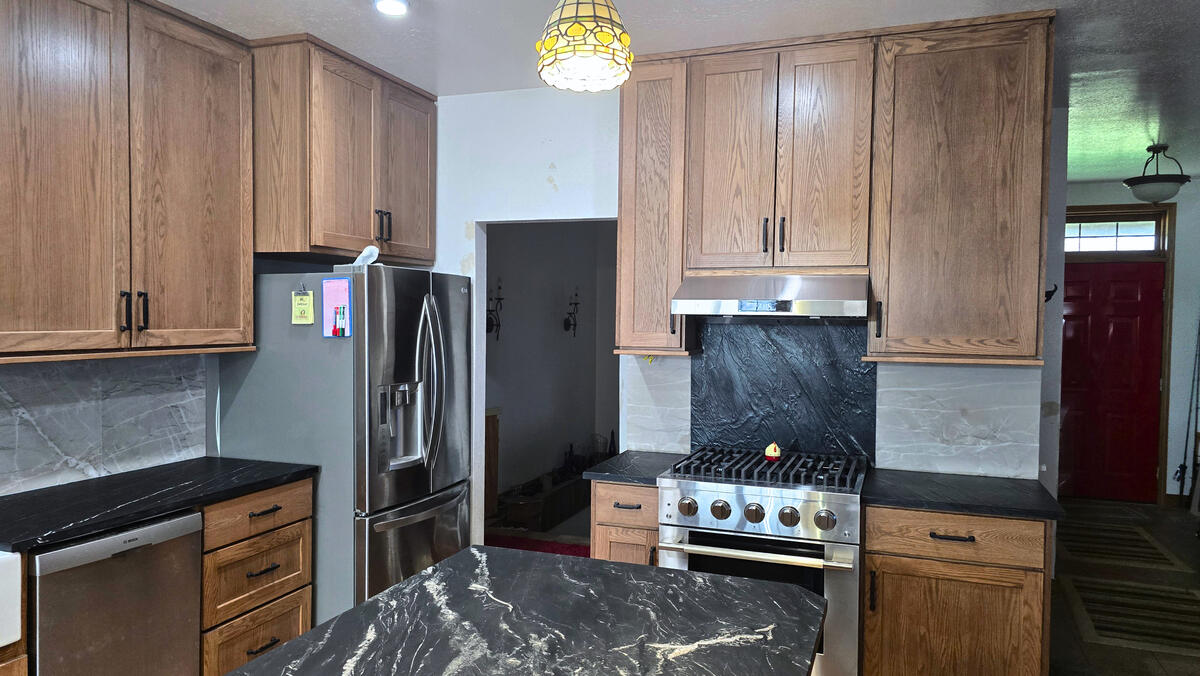
Phase 3: After Countertops & Backsplash (The Finished Look)
The final phase of this project brings everything together.
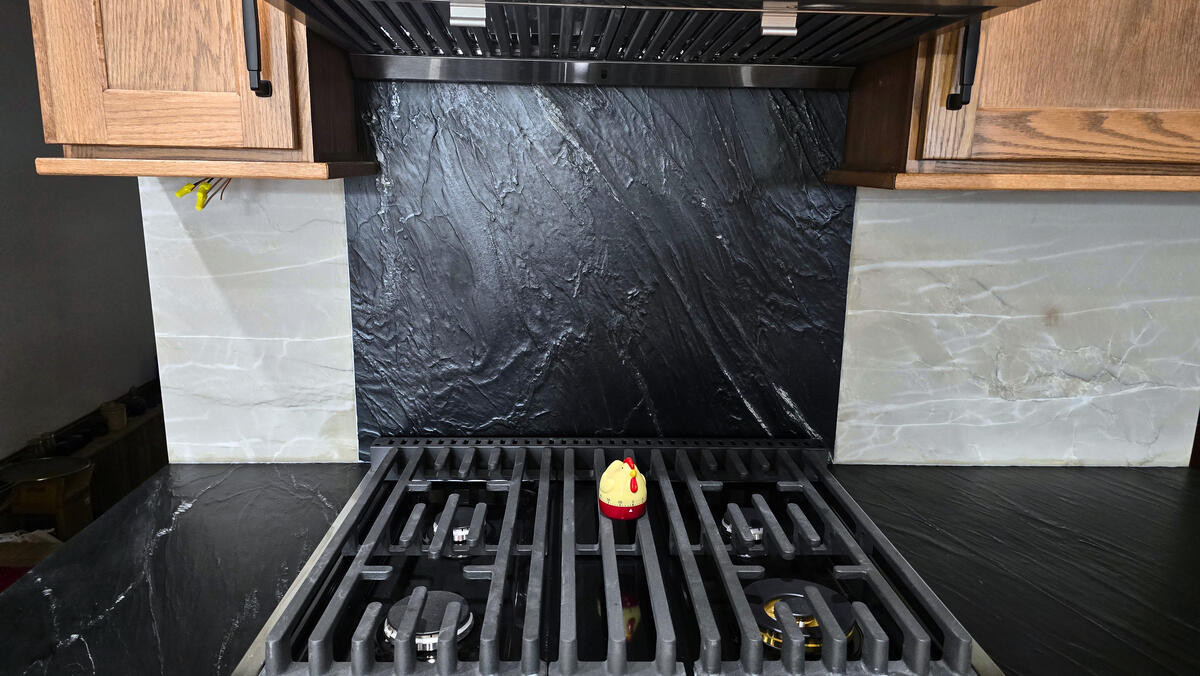
With the installation of quartz countertops and a full quartz backsplash, the kitchen takes on a polished, finished look. These elements not only elevate the design but also add durability and easy maintenance for everyday use.
This stage involves coordinating the countertop company to come install the countertop and backsplash.
This job is unique in that the backsplash behind the stove was made into a feature wall by swapping out the material used for the countertop, instead of the backsplash. This creates a nice contrast and makes this area stand out as a featured section that draws the eye.
At this stage, all the details have come together to create a space that’s both beautiful and built for how the homeowner actually lives.
Tyler walks through this kitchen and explains what we did, while showing off the finished product.
Bringing It All Together for a Beautiful Kitchen Remodel
At Cabinet Innovations, we manage the entire kitchen transformation. From design and custom cabinetry to coordinating countertops, backsplash, and finishing touches, we make the process as smooth as possible.
If you’re thinking about updating your kitchen, whether it’s cabinets, storage upgrades, or a full remodel, we’re here to help bring your vision to life.